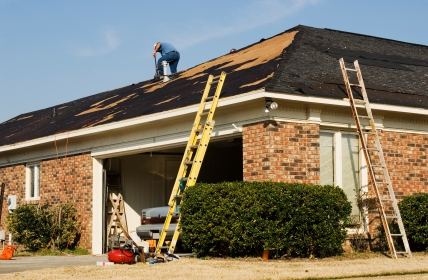
 There is no telling when or how a roof may fail; even a well-built structure can acquire damage after a severe storm. Considering the various weather conditions a roof faces, damage is inevitable. When it does happen, it is important to know a few basic repair skills in case a professional roofer is not readily available!
Basic Tools
Every homeowner should have some basic tools and equipment on hand for roof repair, like an emergency first-aid kit for a roof. Such equipment does not have to be professional grade, but should be adequate to patch a leak or other problem for days to a week until professional help is available. Following are some of the basic tools and equipment to have available.
- Sealant – A sealant is a viscous material applied directly over holes or used as an adhesive to hold two pieces of material together. This is a “must have” tool for DIY repairs because it is easy to apply and can be used on almost any part of a roof or any type of a leak. Once dried, sealant can even be tougher than the original material; some manufacturers even market a sealant that can be applied directly onto a wet surface.
- Extra Shingles – Some extra shingles identical to the ones installed should also be included in a repair kit. If a strong wind rips off some shingles, proper replacement can be done immediately. Replacing shingles is just as easy as removing the broken tiles and fasteners, then hammering new shingles into place.
- Fasteners – Fasteners are used to nailing replacement shingles and other roofing structures in place. Choose a fastener with a wide head with a gasket under the head to ensure a water-tight seal.
- Tarps – Plastic tarps can provide a temporary covering in case a huge portion of the roof is damaged. It is non-permeable and can provide adequate protection from rain and snow while waiting for repair. Staples can be used to hold the plastic tarp in place for a short period of time.
- Crowbar – A crowbar can be used to pry shingles and remove fasteners from the sheathing.
- Hammer – A hammer can be used to install fasteners and break off remaining pieces of broken shingles made of clay, tile and cement.
Repair Steps
With proper supplies on hand, it will take three steps to complete at least temporary repairs.
- Inspection – Inspect the roof for any damage after a severe storm or if any evidence of a leak. Find the area where water is seeping, frequently around flashing and valleys. During the inspection, take note of the extent of the damage and the materials that may be needed to make necessary repairs.
- Surface Preparation – Once the source of the leak is found, prepare the area. Clear away any dust and debris so a sealant can adhere properly to the surface. If the problem is missing shingles, remove the remaining pieces along with the fastener.
- Patching – Choose an appropriate patch. If the damaged area is very large, a plastic tarp can be temporarily used such as when shingles have been ripped off and a large portion of the sheathing has been exposed. A thin slab of wood can be used to fasten the sheet in place. For smaller holes and gaps such as those along flashing, a sealant may be used. If only a few shingles are missing, replacements can be installed in place of old ones and be a permanent fix if correctly done.
Learning basic roof repair skills is sometimes necessary, especially when professional help is not readily available. In doing so, underlying roofing material can be protected from further damage which will keep the costs of professional repair to a minimum. This is the basic secret of roofing repair for beginners – like the Boy Scouts say, be prepared!
Contact the Schulte Roofing Experts for an Outstanding Roofer Houston Contractor!
Are you trying to locate a roofer Houston to help with basic repairs? Contact the Schulte Roofing professionals at 800-367-7663 – they can help you and other greater Houston area customers with the most basic to the most complicated roofing repairs!